2012年1月7日 星期六

php(mysql)上傳限製之設定

用 root 身分編輯 /etc/php.ini , 修改以下資訊:
max_execution_time = 300 ; //每個 script 執行時間上限, 單位是秒.
max_input_time = 300 ; //每個 script 處理輸入資料可用時間上限, 單位是秒.
memory_limit = 999M ; //每個執行中的 script 最多可使用的系統記憶體資源.
post_max_size = 800M ; //PHP 能夠接受發表文章的容量上限.
file_uploads = On ; //這個不用改, 安裝完就是 On 了, 請確定你的也是 On.
upload_max_filesize = 800M ; //允許上傳檔案的最大容量.
default_socket_timeout = 300; //Socket 無回應斷線時間上限.
mysql.connect_timeout = -1 ; //MYSQL 無回應斷線時間上限, -1 代表永遠等下去.

memory_limit > post_max_size > upload_max_size
如果你打算讓你的系統能夠上傳更大的檔案, 可以自行增加某些數值.
但設定過大的值, 不保證系統的穩定性.


有些數值有相互關係, 例如, memory_limit 必須大於 upload_max_filesize 與 post_max_size.

2012年1月6日 星期五

linux 如何關掉SELINUX?

關掉SELINUX,在/etc/selinux/config 設定檔如下;
/etc/selinux/config
# This file controls the state of SELinux on the system.
# SELINUX= can take one of these three values:
#       enforcing - SELinux security policy is enforced.
#       permissive - SELinux prints warnings instead of enforcing.
#       disabled - SELinux is fully disabled.
SELINUX=Disabled  #這樣就把SELINUX伺服器關掉了,請重新開機系統;
# SELINUXTYPE= type of policy in use. Possible values are:
#       targeted - Only targeted network daemons are protected.
#       strict - Full SELinux protection.
SELINUXTYPE=targeted
如果只要關掉selinux而不想重新開機,可以直接下如下指令:setenforce 0

2012年1月5日 星期四

我將原來centos 5廢掉改安裝在centos 6 的方法!

原來在centos 5下,除了系統硬之外,還有兩顆獨立的硬碟,其結構如下

/dev/mapper/VolGroup00-LogVol00
                     113410608  12249788  95306820  12% /
/dev/sda1             19919336    235208  18654668   2% /boot
tmpfs                  1553280         0   1553280   0% /dev/shm
/dev/sdc1            480719056 116089924 340209932  26% /var/www/g2data
/dev/sdb1            480719056 190972784 265327072  42% /var/www/html

其中

/dev/sda1    為第一顆系統碟

/dev/sdb1    為第二顆資料碟(裡面裝著gallery2的所有資料)   掛載路徑  /var/www/g2data

/dev/sdc1    為第三顆資料碟(裡面裝著其它所有網頁服務管理程式及資料)   掛載路徑  /var/www/html


由於是要在一個新的硬碟裡架設新的系統

所以我在一顆新的硬碟裡安裝centos 6

安裝完後 先以yum –y update更新到最新的版本

接著安裝webmin

接著將原系統內之httpd.conf與iptables複製到新的系統內

接著開啟/etc/fstab將最底部加上下列兩行(使系統開機時自動掛載硬碟到/var/www/g2data與/var/www/html)

/dev/sdc1  /var/www/g2data  ext3  nosuid,noexec,nodev  0  0
/dev/sdb1  /var/www/html  ext3  nosuid,noexec,nodev  0  0

再在系統裡安裝ffmpeg與MPlayer及MEncoder(方法請看這篇文章:centos 安裝ffmpeg 及 mplayer mencoder)

還要將原先執行自動備份之contra…的檔案複製到目的地,如此才能接續原先的自動備份功能!

另外/home/http_user這個資料夾整個拷備到新系統的相對位置。

/var底下有幾個自己寫的幾個簡單的script也要拷備到相對位置!

其間會遇到防火牆設定的問題,我必須將舊主機的防火牆設定檔拷回新主機,新主機的senlinux也必須關掉!

然而在重新安裝完後,我遇到了ostube亂碼的問題,也就是在phpMyadmin裡看檔案資料都可以正常觀看中文,如下圖

image

但當我到ostube網站觀看資料時,卻出現如下圖的亂碼?

image

上網找了半天沒有看到像我這樣的問題,但卻有看到有提到網站看沒問題到資料庫端看會出現亂碼的例子,如是我就試著做看看將(資料來源:阿杰老師的 osTube 實驗室

開啟程式 

var/www/ostube/includes/class.database.php

約第50行:找到function DBaccess

往下找到$this->connected = true;(第59行)

在上一行插入@mysql_query("SET NAMES utf8",$this->connection);

參考程式碼如下:


if(!$this -> connection = @mysql_connect($DBhost,$DBuser,$DBpass)) {
     if($this->debug) die("Error: Can not connect to database - " . $DBhost);
              unset($this);
              return false;
         } else {
               $this->connected = true;
          }
改成
if(!$this -> connection = @mysql_connect($DBhost,$DBuser,$DBpass)) {
     if($this->debug) die("Error: Can not connect to database - " . $DBhost);
         unset($this);
         return false;
    } else {
@mysql_query("SET NAMES utf8", $this->connection);
          $this->connected = true;
       }

也就解決了我ostbue亂碼的問題了!真高興!

image

2012年1月4日 星期三

centos 安裝ffmpeg 及 mplayer mencoder

Installing FFmpeg, MPlayer and MEncoder on CPanel and Centos 6 on Hyper-V
Posted in Linux Server, Virtual Machine Manager | 5 Comments | 1,108 views | 03/10/2011 13:52
You need FFmpeg, MPlayer and MEncoder for video processing. I’ll show you how to install and configure it on Hyper-V.
I’ve already posted couple of articles about CentOS 6 installation on Hyper-V, so I won’t mention about that again.
You can see CentOS 6 installation on Hyper-V at the following posts:
So I assume you have a CentOS 6 with Hyper-V LIS v3.1. So lets continue with our installation.
First, we need to install RPMforge repository on CentOS 6.
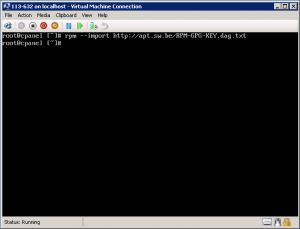
1. Install the DAG GPG key.
rpm --import http://apt.sw.be/RPM-GPG-KEY.dag.txt


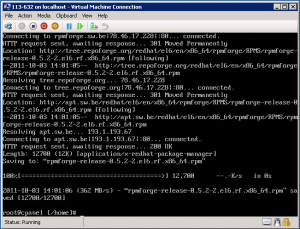
2. Download RPMforge-release package.
cd /home
wget http://packages.sw.be/rpmforge-release/rpmforge-release-0.5.2-2.el6.rf.i686.rpm (if your server x86)
wget http://packages.sw.be/rpmforge-release/rpmforge-release-0.5.2-2.el6.rf.x86_64.rpm

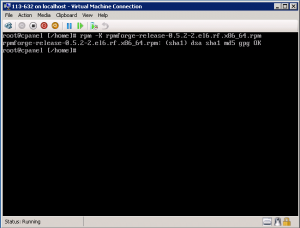
3. Verify the RPMforge-release package you have downloaded.
rpm -K rpmforge-release-0.5.2-2.el6.rf.x86_64.rpm

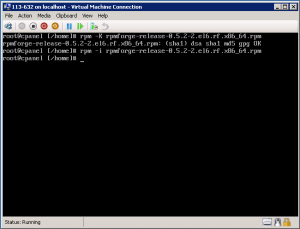
4. Install the RPMforge-release package.
rpm -i rpmforge-release-0.5.2-2.el6.rf.x86_64.rpm

5. Now we can install FFmpeg, MPlayer and MEncoder.
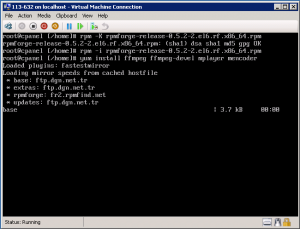
yum install ffmpeg ffmpeg-devel mplayer mencoder

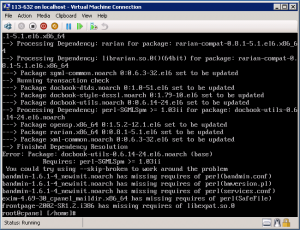
6. You may get this error when you try to install components.
Requires: perl-SGMLSpm >= 1.03ii

7. Download perl-SGMLSpm package to CentOS.
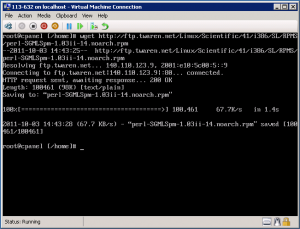
wget http://ftp.twaren.net/Linux/Scientific/41/i386/SL/RPMS/perl-SGMLSpm-1.03ii-14.noarch.rpm

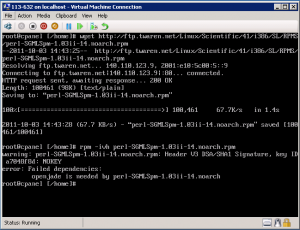
8. perl-SGMLSpm may require OpenJade.

9. Let’s install openjade on CentOS.
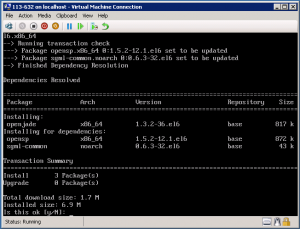
yum install openjade

10. Try re-install perl-SGMLSpm.
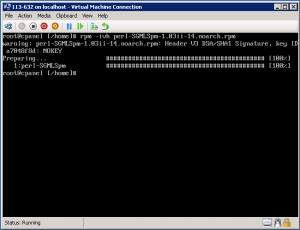
rpm -ivh perl-SGMLSpm-1.03ii-14.noarch.rpm

11. After perl-SGMLSpm installation, you can continue to install FFmpeg, MPlayer and MEncoder.
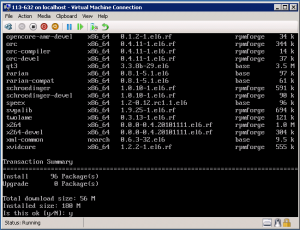
yum install ffmpeg ffmpeg-devel mplayer mencoder

12. Now, you can test your ffmpeg installation.
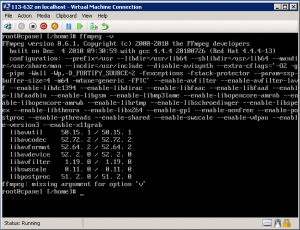
ffmpeg -v

If you see same results on your server, it means your ffmpeg is ready.

2012年1月3日 星期二

linux 開機執行層級之設定

打開這個檔案
/etc/inittab
將其中的
id:3:initdefault:
其中的3改為你要的層級即可

2011年11月19日 星期六

dreamweaver PHP mysql 可以批次更新資料的方法!

底下所提的批次更新資料的方法,是建立在你必須對於DREAMWEAVER的基本更新資料的方法已經有一定的了解之後,才易看懂筆者所寫的內容。若你對DREAMWEAVER更新單筆資料的方法尚且不懂,則不建議你繼續看下去!
這邊筆者僅針對批次更改與單筆更改資料之主要差異處作說明而已:
image
一、首先如上圖,你必須對所有要更新資料的表單欄位之名稱後面加入陣列符如上圖中的score[]
image
二、當然更新資料所必須的隱藏欄位所指向的索引欄也須需如上圖中的index[]一樣加入[]
三、接著在伺服器行為裡加入更新資料(這邊因為一般的圖資料都有提到,所以就跳過,不細述了!)
四、最後在程式碼模式下找到更新資料的語法部份,例如(注意你的語法決對不可能完全與我的一樣,所以你必須視自己的狀況調整)
if ((isset($_POST["MM_update"])) && ($_POST["MM_update"] == "form1")) {
  $updateSQL = sprintf("UPDATE all_data SET leader_study_1=%s, study_mark1=%s WHERE `index`=%s",
                       GetSQLValueString($_POST['score[]'], "int"),
                       GetSQLValueString($_POST['textfield[]'], "text"),
                       GetSQLValueString($_POST['index[]'], "int"));
  mysql_select_db($database_load, $load);
  $Result1 = mysql_query($updateSQL, $load) or die(mysql_error());
  $updateGoTo = "leader_study.php";
  if (isset($_SERVER['QUERY_STRING'])) {
    $updateGoTo .= (strpos($updateGoTo, '?')) ? "&" : "?";
    $updateGoTo .= $_SERVER['QUERY_STRING'];
  }
  header(sprintf("Location: %s", $updateGoTo));
}
改為
if ((isset($_POST["MM_update"])) && ($_POST["MM_update"] == "form1")) {
    $countNum=count($_POST['index']);
        for($i=0 ; $i<$countNum ; $i++){
  $updateSQL = sprintf("UPDATE all_data SET leader_study_1=%s, study_mark1=%s WHERE `index`=%s",
                       GetSQLValueString($_POST['score'][$i], "int"),
                       GetSQLValueString($_POST['textfield'][$i], "text"),
                       GetSQLValueString($_POST['index'][$i], "int"));
  mysql_select_db($database_load, $load);
  $Result1 = mysql_query($updateSQL, $load) or die(mysql_error());
        }
  $updateGoTo = "leader_study.php";
  if (isset($_SERVER['QUERY_STRING'])) {
    $updateGoTo .= (strpos($updateGoTo, '?')) ? "&" : "?";
    $updateGoTo .= $_SERVER['QUERY_STRING'];
  }
  header(sprintf("Location: %s", $updateGoTo));
}
注意上述的更改中,還要將原來語法中的[]刪處掉!
這樣一來才可以批次更新資料。

2011年10月16日 星期日

PHP頁面中-CKeditor網頁編輯器與CKfinder上傳整合應用

編輯器:CKeditor
支援語法:PHP、ASP、ASP.NET、CF
檔案大小:1.99MB
元件版本:3.5.1
官方展示:http://ckeditor.com/demo
官方下載:http://ckeditor.com/download

上傳元件:CKfinder
檔案大小:1.01MB
支援語法:PHP、ASP、ASP.NET、CF
元件版本:2.0.1
官方展示:http://ckfinder.com/demo
官方下載:http://ckfinder.com/download

step1

下載完畢後,將二個元件放在同一目錄,並新增upload資料夾,用來存放上傳檔案。

step2

開啟ckeditor / config.js,分別新增以下語法,控制編輯器選項與啟用上傳功能。

開啟上傳功能:將下面內容加入ckeditor / config.js

config.filebrowserBrowseUrl = 'ckfinder/ckfinder.html';
config.filebrowserImageBrowseUrl = 'ckfinder/ckfinder.html?Type=Images';
config.filebrowserFlashBrowseUrl = 'ckfinder/ckfinder.html?Type=Flash';
config.filebrowserUploadUrl = 'ckfinder/core/connector/php/connector.php?command=QuickUpload&type=Files'; //可上傳一般檔案
config.filebrowserImageUploadUrl = 'ckfinder/core/connector/php/connector.php?command=QuickUpload&type=Images';//可上傳圖檔
config.filebrowserFlashUploadUrl = 'ckfinder/core/connector/php/connector.php?command=QuickUpload&type=Flash';//可上傳Flash檔案

而成為:

/*
Copyright (c) 2003-2011, CKSource - Frederico Knabben. All rights reserved.
For licensing, see LICENSE.html or http://ckeditor.com/license
*/

CKEDITOR.editorConfig = function( config )
{
    // Define changes to default configuration here. For example:
    // config.language = 'fr';
    // config.uiColor = '#AADC6E';
[
    ['Source','-','Templates','-','Cut','Copy','Paste'],
['Undo','Redo','-','Find','Replace','-','SelectAll','RemoveFormat'],
['Link','Unlink','Anchor'],
['Image','Flash','Table','HorizontalRule','Smiley','SpecialChar','PageBreak'],
'/', ['Bold','Italic','Underline','Strike','-','Subscript','Superscript'],
['NumberedList','BulletedList','-','Outdent','Indent','Blockquote'],
['JustifyLeft','JustifyCenter','JustifyRight','JustifyBlock'],
['Format','FontSize','-','TextColor','BGColor']
];
config.filebrowserBrowseUrl = 'ckfinder/ckfinder.html';
config.filebrowserImageBrowseUrl = 'ckfinder/ckfinder.html?Type=Images';
config.filebrowserFlashBrowseUrl = 'ckfinder/ckfinder.html?Type=Flash';
config.filebrowserUploadUrl = 'ckfinder/core/connector/php/connector.php?command=QuickUpload&type=Files'; //可上傳一般檔案
config.filebrowserImageUploadUrl = 'ckfinder/core/connector/php/connector.php?command=QuickUpload&type=Images';//可上傳圖檔
config.filebrowserFlashUploadUrl = 'ckfinder/core/connector/php/connector.php?command=QuickUpload&type=Flash';//可上傳Flash檔案

};

Step3
開啟ckfinder / config.php,找到33行將return false改成return true

{
    // WARNING : DO NOT simply return "true". By doing so, you are allowing
    // "anyone" to upload and list the files in your server. You must implement
    // some kind of session validation here. Even something very simple as...

    // return isset($_SESSION['IsAuthorized']) && $_SESSION['IsAuthorized'];

    // ... where $_SESSION['IsAuthorized'] is set to "true" as soon as the
    // user logs in your system. To be able to use session variables don't
    // forget to add session_start() at the top of this file.
return true;
//    return false; <----註解掉改為上一行的
return true

}

// LicenseKey : Paste your license key here. If left blank, CKFinder will be
// fully functional, in demo mode.
$config['LicenseName'] = '';
$config['LicenseKey'] = '';

/*
Uncomment lines below to enable PHP error reporting and displaying PHP errors.
Do not do this on a production server. Might be helpful when debugging why CKFinder does not work as expected.
*/
// error_reporting(E_ALL);
// ini_set('display_errors', 1);

/*
To make it easy to configure CKFinder, the $baseUrl and $baseDir can be used.
Those are helper variables used later in this config file.
*/

Step4
接著到63行處,設定上傳的目錄位置。

Examples:
    $baseUrl = 'http://example.com/ckfinder/files/';
    $baseUrl = '/userfiles/';

ATTENTION: The trailing slash is required.
*/
// $baseUrl = '/ckfinder/userfiles/';註解掉改為下一行的$baseUrl = '/ckfinder/upload/';

$baseUrl = '/ckfinder/upload/';
/*
$baseDir : the path to the local directory (in the server) which points to the
above $baseUrl URL. This is the path used by CKFinder to handle the files in
the server. Full write permissions must be granted to this directory.

step5

接著在你要使用文字區域的頁面裡加入導入CKEDITOR的核心。找到其<body>下插入下面一段文字串

<script src="ckeditor/ckeditor.js" type="text/javascript"><!--mce:2--></script>

body {
    background-color: #FFFBF0;
}
-->
</style></head>

<body>
<script src="ckeditor/ckeditor.js" type="text/javascript"><!--mce:2--></script>
<div align="center">
<h2><strong>寄信系統</strong>
</h2>
<form id="form1" name="form1" method="post" action="mail_message.php">

step6

找到你要使用CKEDITOR的文字區域的語法,加入class="ckeditor"

  <td bgcolor="#D4DFFF"><div align="right"><strong>內容:</strong></div></td>
  <td bgcolor="#D4DFFF"><div align="left">
      <textarea name="content" class="ckeditor" id="content" cols="50" rows="20"></textarea>
  </div></td>
</tr>
<tr>
  <td bgcolor="#D4DFFF"></td>
  <td bgcolor="#D4DFFF">

最後確認一下可否導入ckeditor?

image

再看可否上傳檔案?

image

一切測試正常!

2011年8月25日 星期四

dreamweaver的怪現象

用dreamweaver改寫php迴圈以達到一次更新多個資料,結果依書上的說明,直接將伺服器行為的更新記錄稍作改

主要加上:

$countNum=count($_POST['index']);
        for($i=0 ; $i<$countNum ; $i++){

$updateSQL = sprintf("UPDATE ``211`` SET sn=%s, `number`=%s, name_student=%s WHERE `index`=%s",
                       GetSQLValueString($_POST['test'][$i], "int"),
                       GetSQLValueString($_POST['test3'][$i], "int"),
                       GetSQLValueString($_POST['test2'][$i], "text"),
                       GetSQLValueString($_POST['Index'][$i], "int"));

  mysql_select_db($database_load, $load);
  $Result1 = mysql_query($updateSQL, $load) or die(mysql_error());

}

結果依書上的邏輯更改後,在更新時卻會出現

You have an error in your SQL syntax; check the manual that corresponds to your MySQL server version for the right syntax to use near '211`` SET sn=980801, `number`=1, name_student='方發' WHERE `index`=1' at line 1

後來發現問題在如下圖所指的,多了兩個單引號

image

將其刪除後,就可以了!

image

2011年8月24日 星期三

Dreamweaver欄位驗證之中文化

在你有要證證欄位的檔案找到如下程式碼,並將其中之相關文字內容中文化即可!

function MM_validateForm() { //v4.0
  if (document.getElementById){
    var i,p,q,nm,test,num,min,max,errors='',args=MM_validateForm.arguments;
    for (i=0; i<(args.length-2); i+=3) { test=args[i+2]; val=document.getElementById(args[i]);
      if (val) { nm=val.name; if ((val=val.value)!="") {
        if (test.indexOf('isEmail')!=-1) { p=val.indexOf('@');
          if (p<1 || p==(val.length-1)) errors+='- '+nm+' must contain an e-mail address.\n';
        } else if (test!='R') { num = parseFloat(val);
          if (isNaN(val)) errors+='- '+nm+' must contain a number.\n';
          if (test.indexOf('inRange') != -1) { p=test.indexOf(':');
            min=test.substring(8,p); max=test.substring(p+1);
            if (num<min || max<num) errors+='- '+nm+' must contain a number between '+min+' and '+max+'.\n';
      } } } else if (test.charAt(0) == 'R') errors += '- '+nm+' is required.\n'; }
    } if (errors) alert('The following error(s) occurred:\n'+errors);
    document.MM_returnValue = (errors == '');
} }

function MM_validateForm() { //v4.0
  if (document.getElementById){
    var i,p,q,nm,test,num,min,max,errors='',args=MM_validateForm.arguments;
    for (i=0; i<(args.length-2); i+=3) { test=args[i+2]; val=document.getElementById(args[i]);
      if (val) { nm=val.name; if ((val=val.value)!="") {
        if (test.indexOf('isEmail')!=-1) { p=val.indexOf('@');
          if (p<1 || p==(val.length-1)) errors+='- '+nm+' 必須是Email位址.\n';
        } else if (test!='R') { num = parseFloat(val);
          if (isNaN(val)) errors+='- '+nm+' 必須包含一個數字\n';
          if (test.indexOf('inRange') != -1) { p=test.indexOf(':');
            min=test.substring(8,p); max=test.substring(p+1);
            if (num<min || max<num) errors+='- '+nm+' 必須要為數字介於 '+min+' 到 '+max+'.\n';
      } } } else if (test.charAt(0) == 'R') errors += '- '+nm+' 是必須有資料的.\n'; }
    } if (errors) alert('The following error(s) occurred:\n'+errors);
    document.MM_returnValue = (errors == '');
} }


之檔案裡,找到以下字串

2011年8月14日 星期日

連羽毛球拍(鈦10),都有假的!不可不慎!

YY的球拍,我用的最順的是鈦10,這支拍子在一般有用過的球友口中評價都很高,由於已停產,所以想說能否上網買得庫存貨,果然在雅虎拍裡,打入關鍵字後,有找到幾支,其中有一個賣家標榜是全新,且價格是1050起標,於是我就大概問一問狀況之後,出價下標,結果沒想到兩天後就收到結標通知,得標價為1050,於是我看了看該賣家的評語,看起來也都還好,雖然評語只有3,於是也就不疑有他的付款取貨,沒想到貨到時,打開,還真令人失望,竟然是一支山寨拍,話說山寨也不太對,應說是仿冒拍!因為它廠牌型號與用原廠的,而唯一與原廠不同的是它的材質,一看就是差很大,即沒有鈦合金的金屬段,其它部分的材質也是看起來沒有原廠堅固耐用,加上其表面拷漆之脆弱,拍子一端原本在地面,另一端不小心輕輕掉落地面,結果拷漆就掉了!

這次只能說一分錢一分貨!價差過大的就要小心,再者這個賣家還算有良心的是,他沒有標價3、4仟元,因為同樣的東西,網路上我還真看到有人標價3、4仟元!

這次網購的經驗特地寫出供參考,只能說自己下標前沒先與賣家多做溝通,然而賣家似乎也有意要欺騙買家,因為有其他買家就提出相關的問題問賣家,而賣家的回覆是庫存貨、直接與日本工廠拿,所以價錢才這麼底!網購最好是選擇賣家有實體店面,可以現場看貨再決定要不要買!